Ever craved that perfect, bar-quality mojito at home, only to be let down by clunky, oversized ice cubes? Or maybe you’ve dreamt of making fluffy snow cones for the kids that rival the ones from the summer fair. This is where our step by step guide using an ice crusher comes in. Forget smashing ice in a plastic bag with a rolling pin—we’re about to elevate your beverage and dessert game. We’ll transform you from an ice-crushing novice into a confident connoisseur, ready to unlock the full potential of this surprisingly versatile kitchen gadget.
What Exactly is an Ice Crusher and Why Do You Need One?
Let’s get straight to it. An ice crusher is a device designed for one primary purpose: to break down large ice cubes into smaller, more manageable pieces. But here’s the secret—not all crushed ice is created equal. The texture can range from coarse, gravel-like chunks perfect for a Moscow Mule, to fine, snow-like fluff ideal for a Sno-ball.
So, why bother? Because the size and texture of your ice dramatically impact your drink or dessert. Smaller ice pieces have a greater surface area, meaning they chill drinks faster and more evenly without over-diluting them. For things like slushies and frozen cocktails, finely shaved ice is the very foundation of that smooth, satisfying texture. It’s the difference between a homemade attempt and a professional creation.
Manual vs. Electric Ice Crushers: Which One is Your Ally?
Before we dive into the “how-to,” you need to know your weapon of choice. Ice crushers generally fall into two camps: manual and electric. Neither is definitively “better”—they just serve different needs.
The Manual Ice Crusher
Think of this as the hands-on, artisanal approach. Manual ice crushers typically feature a hand crank that you turn to grind the ice against a set of blades. They’re often smaller, more portable, and have a certain retro charm.
- Pros: Portable, no electricity needed, generally quieter, affordable.
- Cons: Requires physical effort, smaller capacity, less control over ice texture.
The Electric Ice Crusher
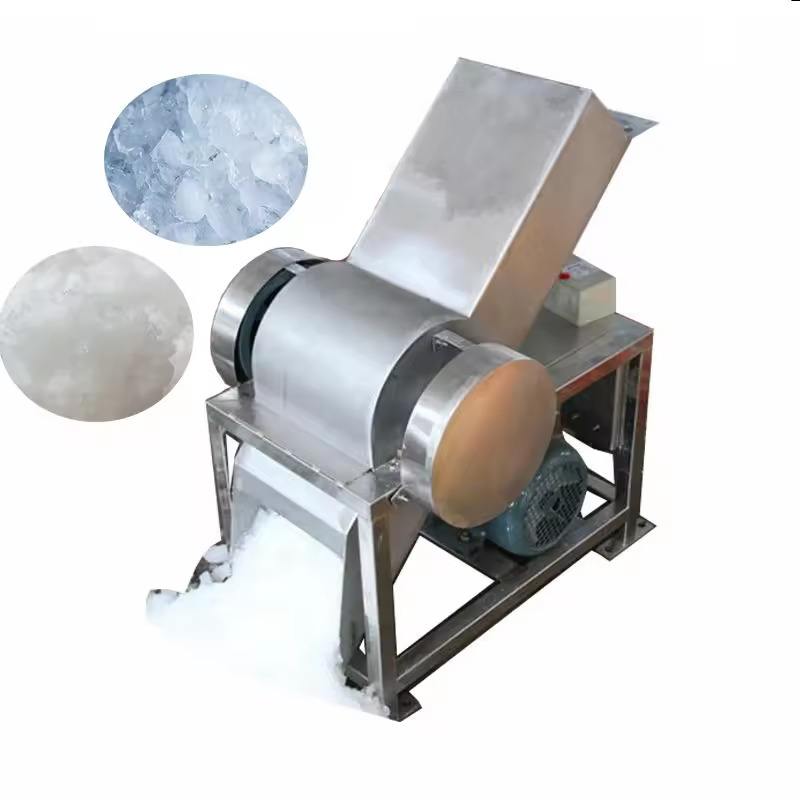
This is the powerhouse. An electric ice crusher uses a motor to do all the work for you, capable of pulverizing large amounts of ice in seconds. They are the go-to for parties, small businesses, or anyone who wants consistency and speed.
- Pros: Fast and efficient, larger capacity, often have adjustable texture settings.
- Cons: Requires a power outlet, can be noisy, generally more expensive.
Here’s a quick comparison to help you decide:
| Feature | Manual Ice Crusher | Electric Ice Crusher |
|---|---|---|
| Power Source | Hand Crank (Your muscle!) | Electricity |
| Best For | Small batches, home bars, camping | Parties, families, frequent use |
| Speed | Slower, depends on user | Very fast (seconds) |
| Capacity | Low to medium | Medium to high |
| Portability | Excellent | Limited to outlet access |
| Noise Level | Low | Moderate to high |
| Price Range | $ – $$ | $$ – $$$ |
Key Features to Look For When Choosing Your Machine
When you’re ready to invest, don’t just grab the first one you see. As a technical advisor, I’ve seen what separates a good machine from a great one.
- Blade Material and Design: Look for stainless steel blades. They’re durable, rust-resistant, and stay sharp longer. The blade design itself dictates the final ice texture, with some machines offering multiple blades or adjustable settings for fine to coarse results.
- Motor Power (for Electric Models): Measured in watts, a higher wattage (e.g., 200W and up) generally means a more powerful motor that can handle larger quantities of ice without jamming.
- Hopper and Container Capacity: How much ice can you load at once (the hopper), and how much crushed ice can it hold (the container)? Think about your typical usage. Are you making one cocktail or a dozen snow cones?
- Safety Features: A good electric model will have a safety switch that prevents the blades from spinning if the lid isn’t securely in place. This is a non-negotiable feature, especially in a home with kids.
- Build Quality: Look for sturdy materials like heavy-duty plastic or a metal housing. A flimsy machine won’t last, especially when it’s vibrating and crushing solid ice.
How to Use an Ice Crusher: A Step by Step Guide
Alright, you’ve got your machine. Let’s make some magic. This is the ultimate step by step guide using an ice crusher safely and effectively, whether it’s a manual or electric model.
Step 1: Preparation is Key
Before you even touch the ice, get your station ready. Have your glasses, syrups, spirits, and garnishes on hand. For chilled drinks, I always recommend pre-chilling your glasses in the freezer for about 10-15 minutes. It makes a world of difference.
Step 2: Choose Your Ice
You might think, “ice is ice,” but that’s not entirely true. For most home machines, standard ice cubes from your freezer tray are perfect. Avoid using overly large or unusually shaped chunks, as they can jam the mechanism. Some high-end machines can handle bigger pieces, but always check your user manual first.
Step 3: Loading the Machine
Open the hopper lid. Don’t overfill it! A common mistake is packing the hopper to the brim. This puts unnecessary strain on the motor or your arm and can lead to an inconsistent grind. A good rule of thumb is to fill it about three-quarters of the way. Secure the lid firmly.
Expert Tip: Michael Carter, a professional mixologist for over 15 years, advises, “For crystal clear cocktails, the quality of your ice matters. If you can, use ice made from filtered water. It not only looks better but tastes cleaner, letting the spirits shine.”
Step 4: The Crushing Process
- For Manual Crushers: Place the machine on a stable, flat surface. Hold it steady with one hand and begin turning the crank with the other. Use smooth, consistent turns. You’ll feel the resistance as the blades bite into the ice. Keep going until all the ice has passed through.
- For Electric Crushers: Ensure the machine is plugged in and on a stable surface. Double-check that the lid is locked in place—the safety switch should be engaged. Depending on your model, you might press a button or push down on a lever to start the motor. It will be loud, but it will also be fast! It should only take a few seconds.
Step 5: Dispense and Serve
Once your ice is crushed to your desired texture, transfer it immediately to your glass or serving bowl using a scoop. Crushed ice melts faster than cubes, so work quickly. Pack it into your glass, pour your ingredients over it, and enjoy the fruits of your labor.
|
Our Picks for the Best ice crusher in 2026
As an Amazon Associate, we earn from qualifying purchases.
|
||
| Num | Product | Action |
|---|---|---|
| 1 | Cuisinart Snow Cone Maker SCM-10P1 |

|
| 2 | Shaved Ice Machine Snow Cone Machine Ice Crusher with Stainless Steel Blade Kitchen Electric for Shaved Ice and Snow Cone (300W 2000r/min) Also Comes with a Free Ice Pick and Ice Cube Tray |
|
| 3 | Shaved Ice Machine Snow Cone Machine Ice Crusher with Stainless Steel Blade Kitchen Electric for Shaved Ice and Snow Cone (300W 2000r/min) Also Comes with a Free Ice Pick and Ice Cube Tray |
|
| 4 | Shaved Ice Machine, Electric 3 Blade Snow Cone Machines, 380W Ice Crusher Machine, 286 lb/hr Ice Crusher, Ice Shaving Machine for Home and Commercial (Silver) |
|
| 5 | HORGELU Ice Crusher Ice Shaver 3 Blades with Ice Pick 286lbs/hr Snow Cone Machine 380W Shaved Ice Machine 2000rpm Food-grade Stainless Steel Ice Shaved Machine 110V Snow Cone Maker for Home Commercial |
|
| 6 | OKF Ice Shaver Prevent Splash Snow Cone Machine, Electric 3 Blades Shaved Ice Machine, 380W Ice Shaver Machine, 286lbs/hr Shave Ice Machines, Snowcone Machines, Ice Crusher (Silver) |
|
| 7 | VEVOR 110V Commercial Ice Crusher 661LBS/H, ETL Approved 300W Electric Snow Cone Machine with Dual Blades, Stainless Steel Shaved Ice Machine with Safety On/Off Switch for Family, Restaurants, Bars |
|
| 8 | Shaved Ice Machine 380W Electric Ice Crusher Triple Blades Ice Crusher Shaver 286lbs/hr Snow Cone Machine 1500 RPM Stainless Steel Ice Shaver Ice Shaving Machine for Home and Commercial |
|
| 9 | Shaved Ice Machine Snow Cone Machine Ice Crusher with Stainless Steel Blade Kitchen Electric for Shaved Ice and Snow Cone (300W 2000r/min) Also Comes with a Free Ice Pick and Ice Cube Tray |
|
| 10 | Ice Shaver and Snow Cone Machine, Premium Portable Ice Crusher with Free Ice Cube Trays - BPA Free |
|
Beyond the Bar: Creative Uses for Crushed Ice
Your ice crusher is not just for cocktails and sodas. Think bigger! I’ve used mine for everything from kitchen prep to creating stunning party displays.
- Desserts Galore: This is the most obvious one. Make classic snow cones, Hawaiian shaved ice, or sophisticated Italian granitas. Drizzle with fruit purees, condensed milk, or your favorite syrups.
- Seafood Displays: Hosting a dinner party? Create a professional-looking seafood platter by laying shrimp cocktails, oysters, or crab legs on a bed of finely crushed ice. It keeps everything perfectly chilled and looks incredibly elegant.
- Iced Coffee and Tea: Forget watering down your morning brew. Using crushed ice chills your coffee or tea almost instantly, preserving its bold flavor.
- Therapeutic Use: A bag of finely crushed ice is more comfortable and conforms to your body better than hard, lumpy cubes for soothing sprains and injuries.
Keeping Your Machine in Top Shape: Cleaning and Maintenance
A clean machine is a happy machine. Proper maintenance ensures longevity and hygienic operation. It’s simple, I promise.
- Unplug First! This is the most important step for electric models. Safety first, always.
- Disassemble: Carefully take apart any removable pieces, like the collection bin, lid, and hopper.
- Wash Gently: Wash these parts with warm, soapy water. Avoid using abrasive sponges that could scratch the plastic or metal. A soft cloth or sponge is perfect.
- Wipe the Base: For the main unit (especially electric models with a motor), never submerge it in water. Simply wipe the exterior and the blade area carefully with a damp cloth. Be very cautious around the sharp blades.
- Dry Thoroughly: This is crucial to prevent rust on the blades and mold from forming. Air dry all the pieces completely or wipe them down with a dry, clean towel before reassembling.
- Store Properly: Store your ice crusher in a dry place to protect the blades and motor from moisture.
Frequently Asked Questions (FAQ)
Q: Can I use my blender as an ice crusher?
A: While many blenders have an “ice crush” setting, they often produce inconsistent results—a mix of powder and large chunks. A dedicated ice crusher is designed specifically to produce a uniform texture, whether coarse or fine, which is far better for high-quality drinks and desserts.
Q: How do I get that fluffy, snow-like texture for snow cones?
A: For true “snow,” you need a machine often labeled as an “ice shaver” rather than an “ice crusher.” These machines shave a thin layer off a block of ice, rather than crushing cubes. However, many modern electric ice crushers have a “fine” setting that gets you incredibly close to that perfect snow cone texture.
Q: My manual ice crusher is hard to turn. What am I doing wrong?
A: You are likely overfilling the hopper or using ice cubes that are too large for the machine. Try filling it only halfway and using smaller, standard-sized cubes. A steady, firm turning motion is also more effective than trying to force it quickly.
Q: Is it normal for an electric ice crusher to be very loud?
A: Yes, it is. The sound of a powerful motor breaking apart solid ice is inherently noisy. It’s usually a quick process, lasting only a few seconds. If you hear unusual grinding or rattling sounds, however, stop the machine and check for jams.
Q: Can I put anything other than ice in my ice crusher?
A: Absolutely not. Ice crushers are specifically engineered for frozen water. Trying to crush other items, even frozen fruit, can damage the blades, strain the motor, and void your warranty.
Your Journey to Ice Perfection Starts Now
There you have it—your complete step by step guide using an Ice Crusher. You’re now equipped with the knowledge to choose the right machine, use it like a seasoned pro, and keep it running for years to come. From a simple glass of iced tea to an elaborate cocktail party, mastering the art of crushed ice is a skill that will consistently elevate your creations. So go ahead, unleash your creativity and show the world what your new favorite kitchen tool can do. We can’t wait to see what you come up with.